Help
Every step, on the real screen
Four things people ask about most, shown exactly as they look on the Mac and on the iPhone. Nothing here needs a setting you have to hunt for: each step names the button you will see.
Link your iPhone to your Mac
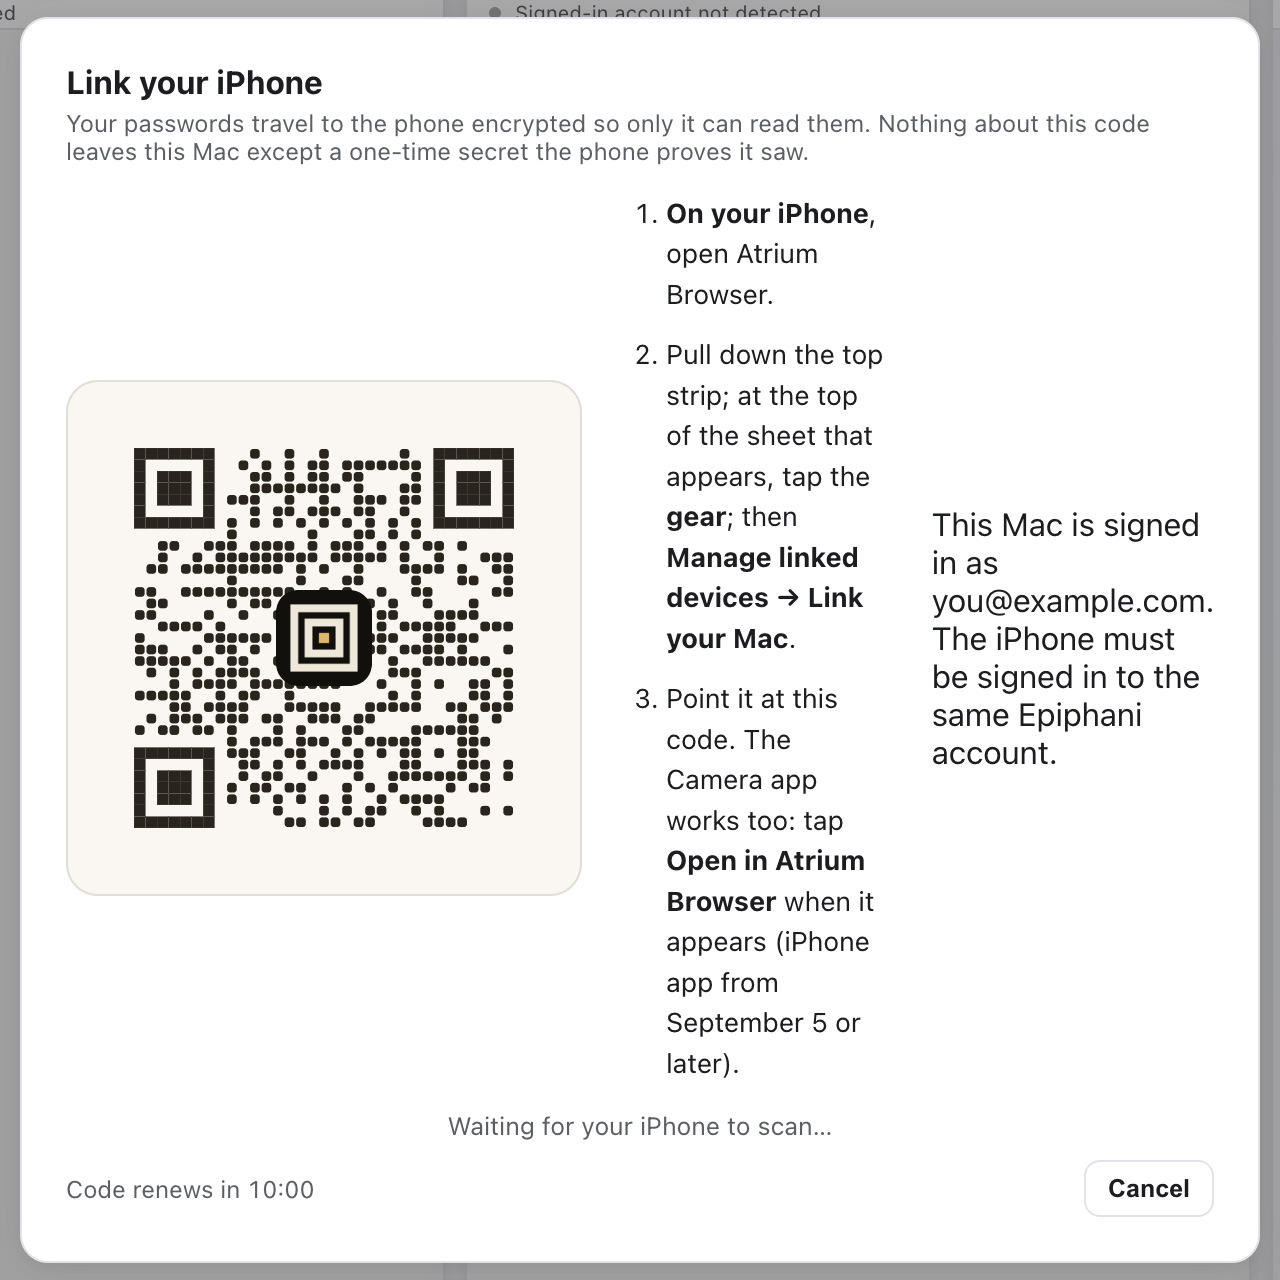
Your saved logins travel to the phone encrypted so only the phone can read them; Face ID then fills them in Safari and other apps. Both devices must be signed in to the same Epiphani account. Linking takes about a minute.
On the Mac
1Settings › Account › Linked devices, then Link your iPhone….
The Link window shows a code that renews itself every ten minutes. Leave it open.
On the iPhone
2Pull down the strip at the top of the screen. A sheet slides down.
The gear is at the top right of this sheet.
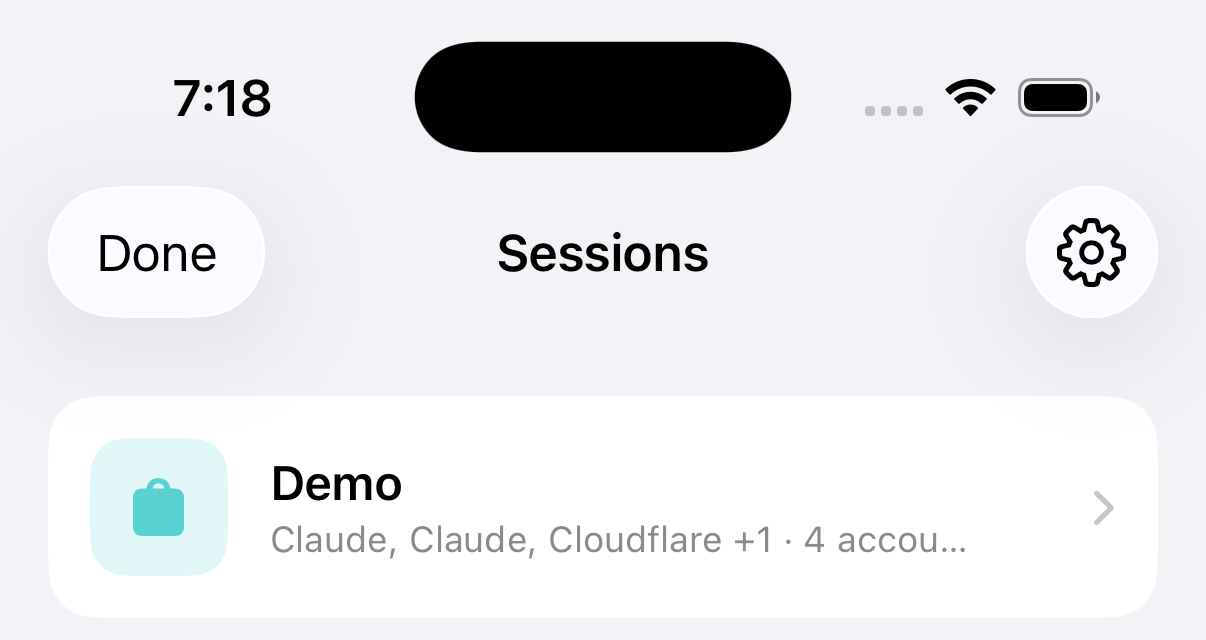
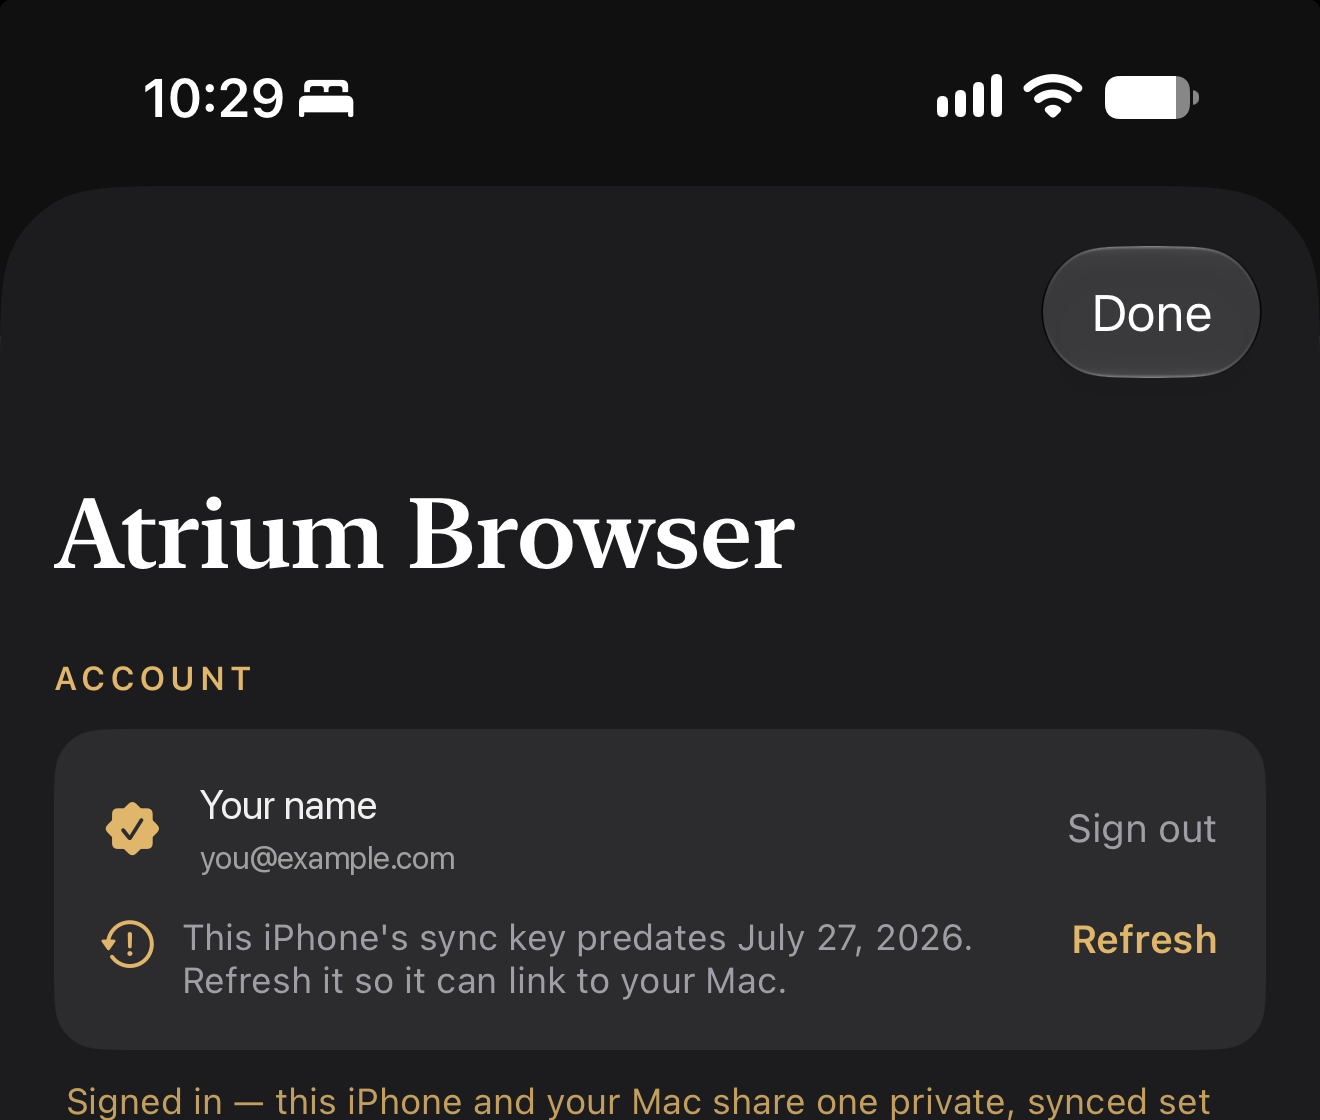
3Tap the gear. Under Account, confirm the address matches the Mac's.
If the card says Refresh or you signed in before July 27, 2026, tap Refresh (or Sign out, then sign in) before scanning.
4Tap Manage linked devices, then Link your Mac, and point the camera at the Mac's code.
Scan once. The Mac's window says "Linked" within a few seconds and the phone says your passwords are on their way.
When linking stalls
Two messages cover almost every stall. Each names the one fix.
"Your iPhone's sync key doesn't match this Mac's" (on the Mac) or "This iPhone's sync key predates July 27, 2026" (on the phone). The phone is holding an old key. On the iPhone: pull down the top strip, tap the gear, and on the Account card tap Sign out, then sign back in with the same address as the Mac. Then scan the code once.
"That code was already used" or "Could not reach the relay". A code can be scanned once per five minutes. Wait for the Mac's code to renew (it counts down on the window) or open a fresh one from Linked devices, then scan once.
"Waiting for your Mac to confirm" for more than a minute. The Mac's Link window was closed or its code expired. On the Mac open Settings › Account › Linked devices › Link your iPhone for a fresh code, then scan again.
Import your logins from 1Password
Atrium keeps its own encrypted vault so tiles can sign themselves in. Importing copies logins from 1Password into it; 1Password stays the source of truth and is never changed. Each read asks for Touch ID once.
On the Mac
1Settings › Passwords, then From 1Password….
The first time, 1Password asks you to allow its command-line integration: 1Password › Settings › Developer › Integrate with 1Password CLI.
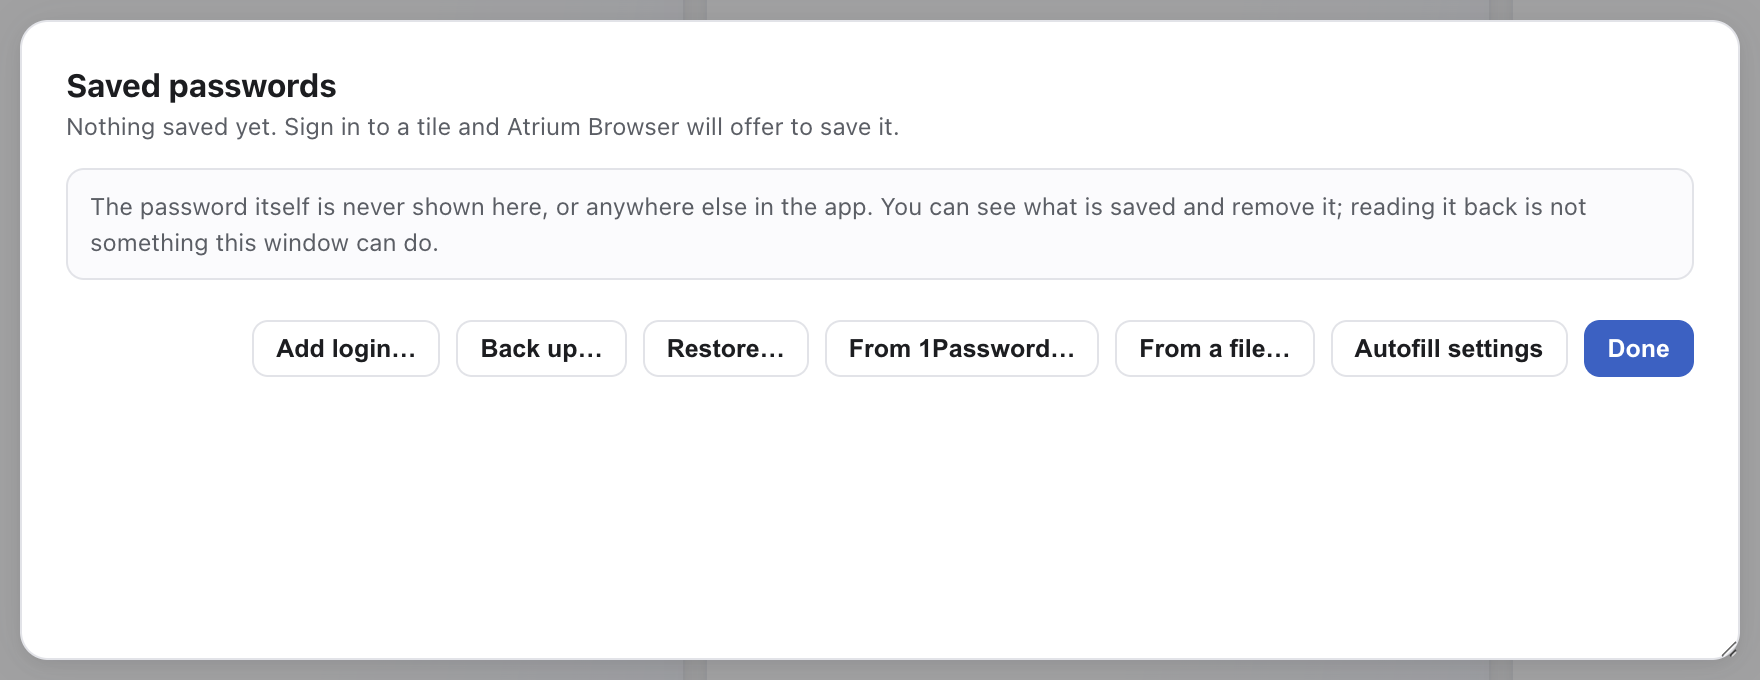
2Pick the account and the vault, then Tick everything (or tick the ones you want) and press Import.
Each row already carries a safe destination: a login that matches exactly one tile fills it; anything else becomes its own new login.
Keep it in sync. Tick "Keep this vault linked" on the picker and new items in that vault land in Atrium on launch, or with Sync now under Saved passwords. Hands-free sync reads through a 1Password service account, so today it covers the vault that account can see; other vaults import through the picker.
Fill a tile from 1Password
For a tile that is signed out, one click finds the matching 1Password item across all your vaults, saves it into Atrium, and signs the tile in.
1On the tile, click the key (⚿) in its header, then Fill from 1Password….
The menu also holds Fill now, Sign in now, and the automatic sign-in switch for logins Atrium already has.
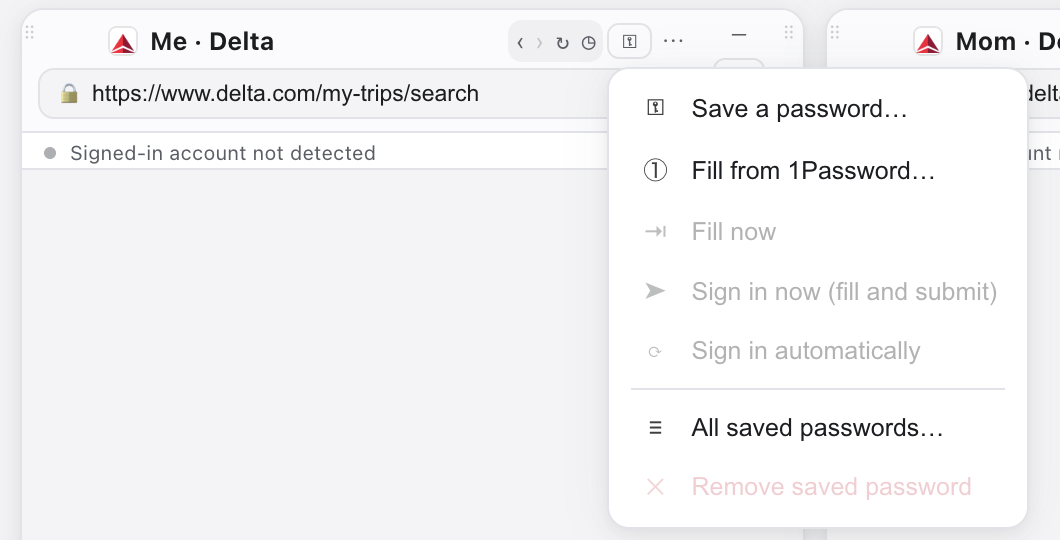
2Pick the item (it shows the title, username and vault), then Use and sign in.
The password goes straight from 1Password into Atrium's vault; it never appears on screen.
Which version am I on
Settings › Software Update shows the version and the build on its first line, for example "up to date (v0.59.17, build 265)". The About window (Atrium Browser menu › About) shows the build under the version. Every version is published with its build number and a checksum on the update feed.